With my one of my favorite holidays fast approaching, it was time to get started on my wreath. I searched pinterest for an inspiration wreath. I found several awesome wreaths but decided on this one (primarily because it's the only one my husband really showed any interest in).
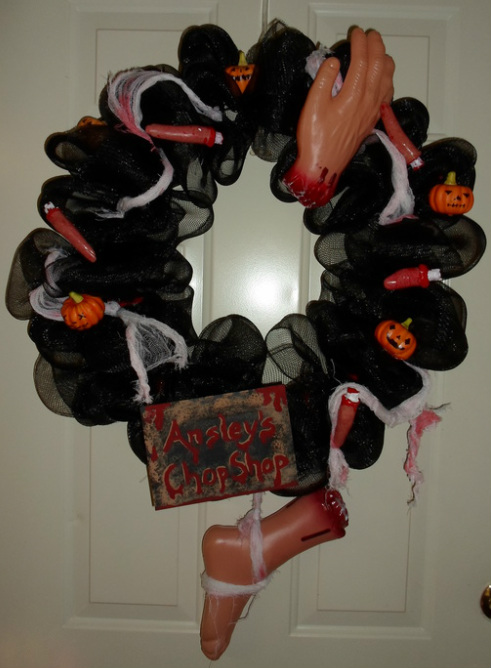
My Version
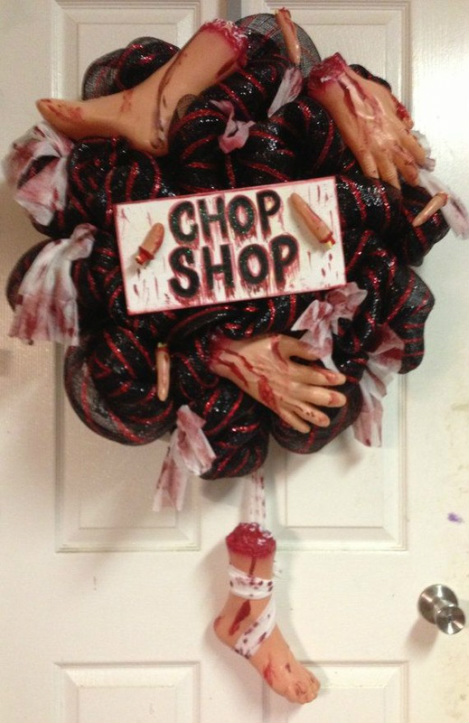
Inspiration Wreath
This wreath was available for purchase on etsy at: http://www.etsy.com/shop/HighMaintenanceDes?ref=l2-shopheader-name
Des makes some amazing wreaths. But being the budget friendly girl I am, I couldn't bring myself to spend that much on a wreath. Sorry Des! So using her basic idea I headed off to the Dollar Tree and Ben Franklin Crafts to gather supplies.
I decided to make mine a little less frilly... and less bloody. By the looks of it she added some blood to her gauze and body parts, none of the parts I found had that much blood on them. I'm sure some red paint could give you that same effect. Ok now for the how to part!
To make my version you'll need:
- A wire wreath frame
- your color choice in large mesh (I went with black).
- Pipe cleaners
- Bloody hands, feet and fingers (Dollar Store)
- Some bloody cloth (or make your own with red dye and some medical gauze)
- A small piece of wood for your sign
- Craft paints again in your choice of colors.
- Paint brushes (small for writing and blood detail)
- Your handy dandy glue gun
- Some little foam pumpkins
- A black sharpie
You can buy wreath frames for making these mesh wreaths pre made but at $10.99 I'd rather spend a little extra time and get the $3.99 wire frame, and $.89 on the pipe cleaners.
Space out your pipe cleaners wrapping them around your frame I put 2 for every little section.
Space out your pipe cleaners wrapping them around your frame I put 2 for every little section.
Next you want to start gathering you mesh and attaching it to your frame. I saw on one site to gather the very end and use a little scotch tape to help secure it. (this did help, just wrap some extra tape around the frame)
I was able to go around the frame twice with the mesh. You can make your mesh loops as big or small as you want. If the loops are bigger then it comes out more like the inspiration wreath but that also makes it a bit more transparent. So you'll need 2 rolls of mesh.
I was able to go around the frame twice with the mesh. You can make your mesh loops as big or small as you want. If the loops are bigger then it comes out more like the inspiration wreath but that also makes it a bit more transparent. So you'll need 2 rolls of mesh.

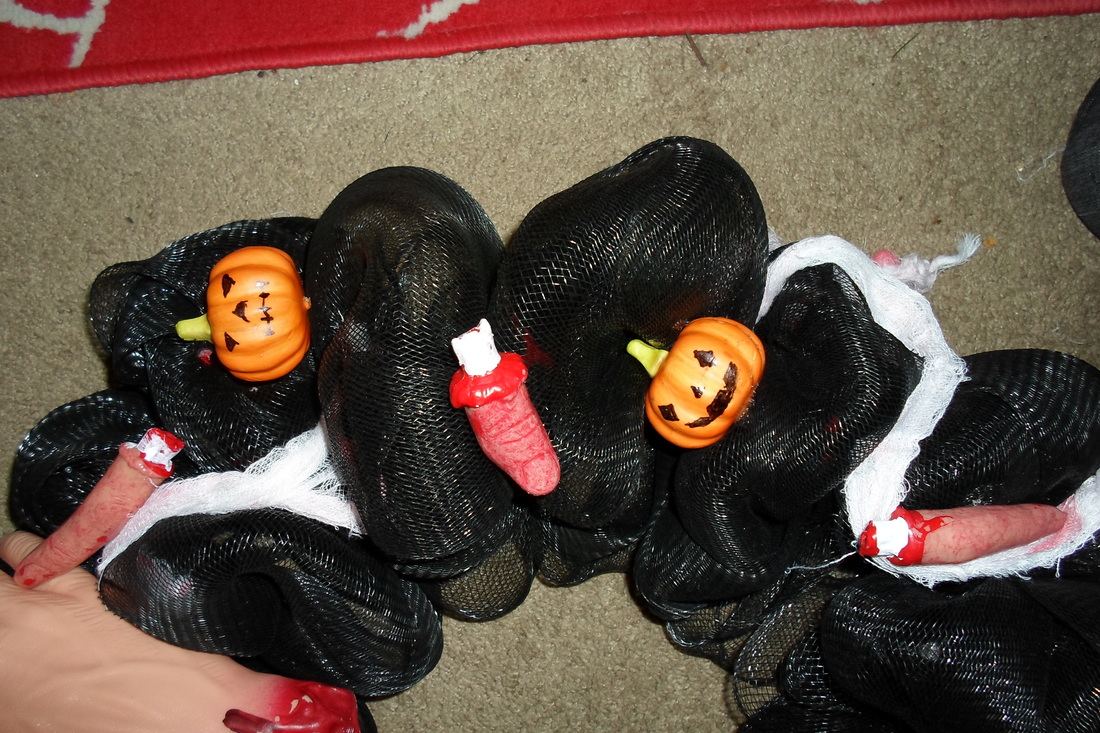
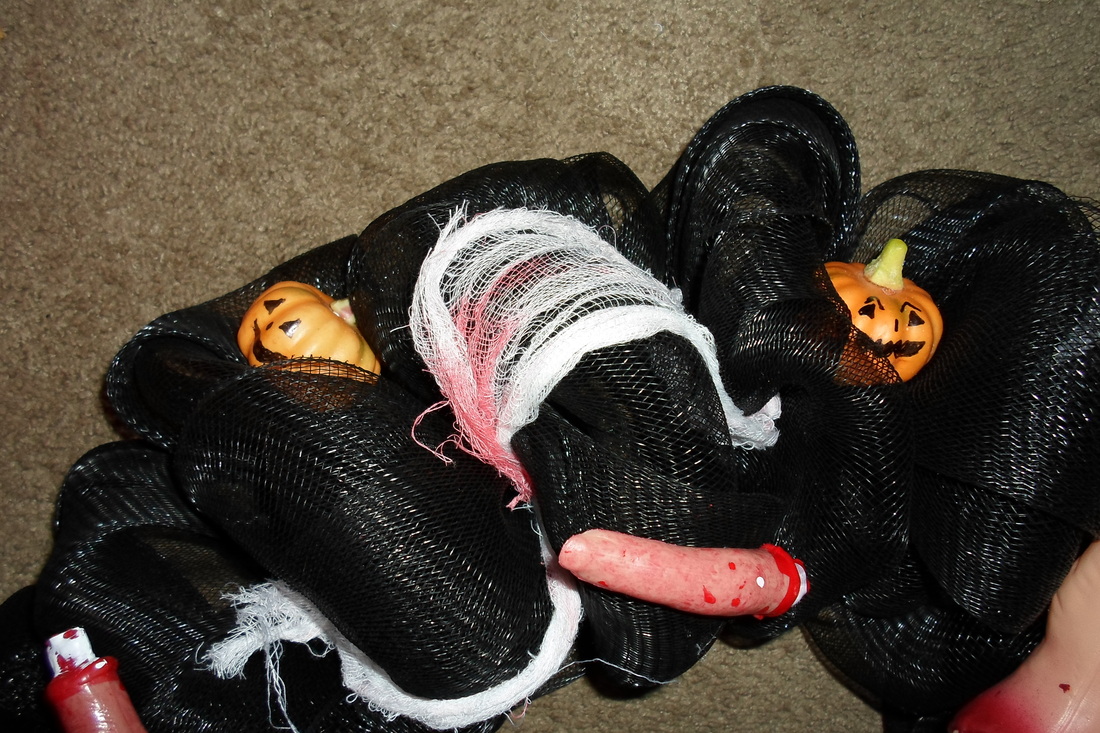
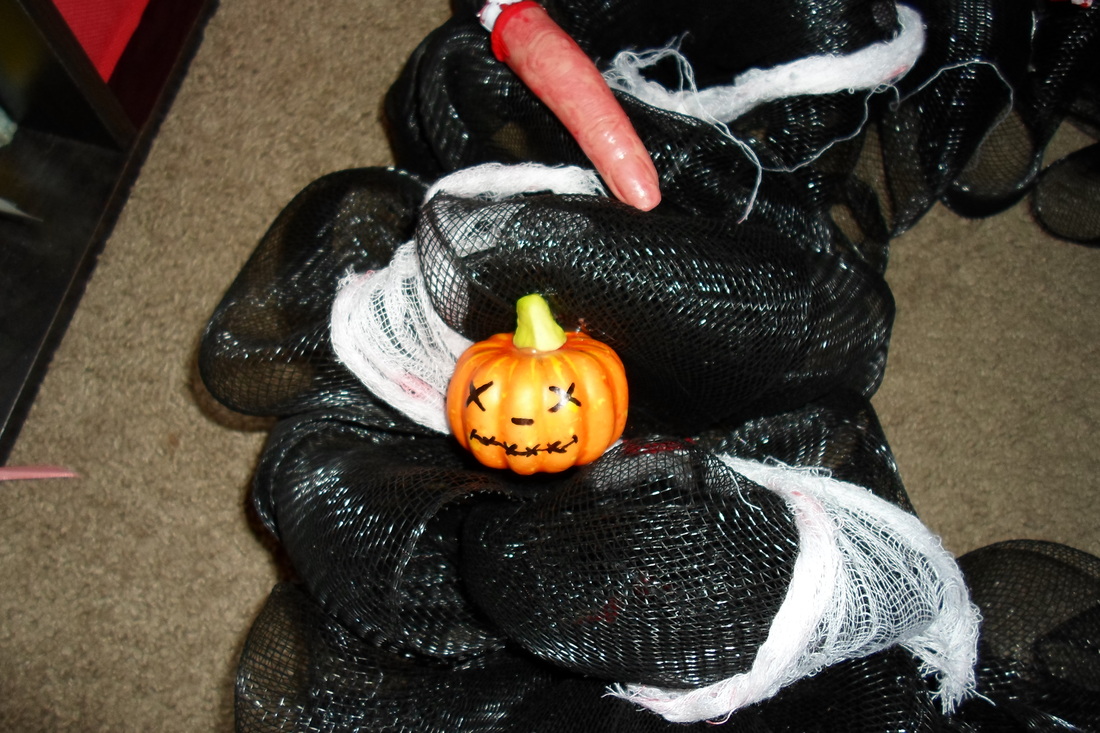
Once you have your mesh the way your want it start positioning your pieces until you are happy with how they will look. I drew little jack-o-lantern faces on my pumpkins with a sharpie, making each one a little different just for fun. (images below)
Tie on your gauze and tie the foot (or hand) to the bottom, hot glue all your pieces into place.
Tie on your gauze and tie the foot (or hand) to the bottom, hot glue all your pieces into place.
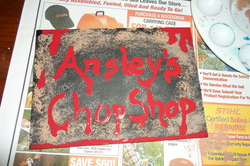
Once all your pieces are in place its time to paint our sign!
I spray painted the whole board black then sponged on some tan and painted on the wording and dripping blood.
(To make the normal red paint a bit more blood red I added a few drops of brown paint a drop at a time until it reached a shade I liked)
I spray painted the whole board black then sponged on some tan and painted on the wording and dripping blood.
(To make the normal red paint a bit more blood red I added a few drops of brown paint a drop at a time until it reached a shade I liked)
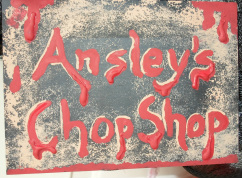
The wording didn't stand out enough for my liking so I highlighted it with some more of the tan paint using a thinner paint brush and to give the dripping blood a more 3-D look I added some hot glue and then painted over it.
Once your sign is dry Just hot glue it in place. My hot glue gun is dual temp. so I put it on low and just kind of held the sign in place until it was positioned the way I wanted it.
Once your sign is dry Just hot glue it in place. My hot glue gun is dual temp. so I put it on low and just kind of held the sign in place until it was positioned the way I wanted it.
Pull out your Wreath hanger and enjoy!!!
Happy Haunting Everyone... Check Back soon for my Fall Wreath!
Happy Haunting Everyone... Check Back soon for my Fall Wreath!
 RSS Feed